Introduction
I love to bake. As of writing, I have baked virtually all of my household’s bread for over two years, and bake at least weekly. The majority of the baking I do is sourdough bread. What follows is a living document where I keep track of my current sourdough baking process, and snippets of information; updating, subtracting and adding to it as I learn.
I started by baking the country bread recipe from Tartine Bread over and over and over again, until I picked up a feel for the process. At that point I started bringing in ideas and techniques from other bakers, including:
- The Perfect Loaf
- Full Proof Baking
- Flour, Water, Salt, Yeast by Ken Forkish

Before You Start
List of Equipment
Must-have
Outside of a work surface and an oven, I don’t think much in the way of specialty equipment is required to make a really good loaf of sourdough. In fact, there are only two things I find completely necessary:
- A 5 quart cast iron dutch oven. The bread is baked in here.
- A bench knife to handle dough. I guess technically this is optional, but the dough on this page is pretty high hydration, and handling it without a bench knife is difficult.
Nice-to-have
Like a lot of hobbies, there are a lot of things you can spend money on, the following are items that might not be in a kitchen that are useful for bread baking:
- A baker’s lame to slash the bread (can use a sharp knife if this is unavailable)
- Wood or wood pulp bannetons to proof the dough in (can use a bowl with a tea towel inside if this is unavailable)
- A cooling rack (if you don’t have one of these, just make sure there is airflow under the bread somehow when it’s cooling. In the past I have just used an upturned bowl and leaned the loaf on that)
Decide How Much Bread to Bake
I start by deciding how much I’m going to bake. I have found that 750 g of dough is enough to bake a small loaf, and a large loaf is around 1,000 g of dough. My typical bake is 2,500 g, which is 2 small loaves and a large one.
Whatever you decide to do, put the total desired weight of bread here and all the measurements on the page will scale.
Desired Dough Weight:
I usually bake once a week, over the weekend so the instructions here reflect that. If you bake significantly more (or less), then the timings around refreshing the starter will be different.
Ingredients for {{weight}} g of Dough
As the book by Ken Forkish states, the only ingredients needed for good bread are flour, water, salt, yeast. Thoughts on each below.
Flour ({{1000*fac}} g)
As much as I would like to be one of those people who enjoys wholegrain bread, I love white bread. Most of my bakes are 90% white bread flour and 10% whole wheat flour.
Flour is one place where it’s worth spending a little bit more to get a better quality product. Depending on what I’m after, I’ll generally use King Arthur all-purpose flour, or King Arthur Bread flour.
The difference between these two flours is primarily the protein (gluten) content. Bread flour contains more protein, so the gluten network in the dough will get more strongly developed. The difference in the finished loaf is that bread made with bread flour is chewier, and has a more defined structure.
I go back and forth on which I prefer. Do whatever works for you.
Water ({{750*fac}} g)
I’m not fussy here. If I would drink it, I would use it in bread. I use the tap water that comes out of the filtered spigot on my fridge.
Fermentation is controlled in large part by temperature, and the initial temperature of your dough is largely controlled by the temperature of your water. I like to ensure that the water is 80 F or so. If it is significantly colder, it will initially slow fermentation and all the times will be longer. If you go above 105 F, the temperature will kill the yeast. I tend not to bother with a thermometer here, but want the water to be just the tiniest bit warm feeling when I add it to the flour.
Salt ({{20*fac}} g)
I use fine-grained sea salt. Fine grained salt will dissolve faster into the dough than something with larger grains like kosher salt.
Salt does a lot of things to bread. Don’t use iodized salt. Iodine can impart a flavor to the bread. If you forget to add salt, the bread will taste noticeably “flat”. Because of this, I have not forgotten to add salt a second time.
Yeast (from {{200*fac}} g leaven)
We don’t use a traditional baker’s yeast, but a levain made from fermented flour and water. I’m not covering how to make a starter in this document. I have never actually made one, just asked friends for bits of theirs.
I tend to keep my starter in the fridge during the week, and revive it on Fridays to bake. If I skip baking for a week I do tend to feed the starter, although have occasionally forgotten to do so with no real ill effects.
My Schedule
I usually bake on the weekends, which means my schedule works out as follows:
- Friday: Revive the starter and build a leaven.
- Saturday morning: Make loaves and do bulk fermentation
Then, depending on my schedule, one of:
- Saturday afternoon: Do a fast secondary fermentation for 3-4 hours, and bake on Saturday evening
- Sunday morning: Do a slow secondary fermentation in the fridge for 15 hours, and bake on Sunday morning
The work on Friday takes approximately 5 minutes, it’s mainly waiting for sourdough starter to grow, so I just fit it in whenever. The time consuming part of the bake happens on Saturday morning, when the bread requires a period of a few hours where you can be in and out of the kitchen. Finally, when it happens, baking will take approximately 40-60 minutes per loaf, and will require going to the oven approximately once every 20-30 minutes.
Making Bread
Make the Leaven
I keep my starter in the fridge during the week. After this amount of time, the starter will have built up a lot of lactic acid and be very sour. We’ll feed it twice on Friday to both wake it up and dilute away the lactic acid. On Friday morning, mix:
- 25 g starter (discard, or eat, the rest)
- 50 g flour
- 50 g warm water
Cover and leave at warm room temperature until the evening. It should have a bubbly consistency and have risen to approximately twice its original size. Now, into a fresh container make a total of {{400*fac}} g of levain by mixing
- 1 tbsp of this bubbly starter
- {{200*fac}} g water
- {{200*fac}} g flour
You will use {{200*fac}} g of this in baking, and the other half becomes your next sourdough starter. Move the newly mixed levain to a cool place (I use my office, which is typically a few degrees cooler than the kitchen) and leave it overnight.
Make the Dough
Bulk Fermentation
Bulk fermentation is one of the most important steps of bread baking. It begins right when mixing ends and lasts until the dough is divided and preshaped. The name signifies exactly what it is: the step when the dough is fermenting in a large, single mass.
When you wake up in the morning, last night’s levain should have visible bubbles, have increased in size from the previous night, have a pleasantly sour aroma, and display a general breakdown and loosening of the consistency. If the leaven is displaying all of these signs, it is ready to bake. You can also do the “float test” (drop a bit of the leaven in water, if it’s ready it’ll float), which is pretty reliable for the sourdough starter described here, although if you change flour types or hydrations may become less reliable.
Take half of the levain, put it back in a lightly covered container in the fridge. This is your new starter. The other half is ready to make bread with.
Start by mixing the following ingredients:
- {{200*fac}} g leaven
- {{1000*fac}} g flour
- {{700*fac}} g water (note: water is used twice in this recipe)
In a bowl until no dry flour remains. Do not overmix at this point, the dough can look “shaggy”, your only goal is to get the flour in contact with water. You’re now going to move on to doing the “autolyse”
The Autolyse
The autolyse is literally just leaving the shaggy dough mix alone for 30 minutes. Cover the dough, and set it aside.
What’s happening during the autolyse is that the flour is absorbing the water, becoming fully hydrated. This activates enzymes in the flour that start gluten development. The important thing is this is happening before any kneading is done. Too much kneading can result in an over oxidised dough which detracts from the finished bread’s colour, flavour and texture. The salt is added after the autolyse stage because the addition of salt tightens the gluten network.
Post-autolyse
After the 30 minutes of autolyse, it’s time to add water and salt to the mix. Add:
- {{50*fac}} g water
- {{20*fac}} g salt
To the dough. Since at this point you’re typically going to do a fair amount of mixing, I don’t do anything fancy, just pour the salt on the dough and the water on top of that. Hand-mix for 5 minutes. I use the “Rubaud method”, as detailed in this video
After mixing, move the dough into a clear container so you can see it, and set a series of 30 minute timers (30 minutes, one hour, 90 minutes, etc.) up to 4 hours. You’ll do a set of stretch-and-folds every 30 minutes, until the dough is ready.
Stretch and Folds
Each time a timer goes off, perform a set of stretch-and-folds, as detailed in this video
Stretching and folding replaces kneading in this recipe. Each round of stretch-and-folds will strengthen the gluten and gently incorporate air into the dough without kneading.
Knowing When Bulk Fermentation is “done”
Finding the exact point to end bulk fermentation takes practice. I find it’s typically at some point between 3 and 4 hours. Look for a dough that’s risen significantly and is much smoother than when bulk started. If you tug on the dough a little with a wet hand, you’ll feel resistance and elasticity.
Additionally, look for liveliness. Gently shake the bowl and it’ll jiggle, letting you know there’s plenty of aeration in the dough.
Making this call can be difficult. Cutting bulk fermentation short might mean your dough won’t be sufficiently fermented and you’ll head toward an under-proofed result. On the other hand, if you push bulk fermentation too far, your dough will be hard to handle and on the verge of over-proofing and losing important structure.
Divide, Pre-shape, and Bench Rest
Once you are satisfied that the bulk fermentation is done, gently remove the dough from the plastic container to your bench. Please note, your bench should be unfloured. You’re about to want the dough to stick a little bit to it.
Split the dough into as many pieces as loaves you plan to bake. Use a bench knife for this and make deliberate, firm movements to cut the dough. The less you handle the dough the better at this point.
With the dough divided, it is time to pre-shape. This is going to build some initial tension in the surface of the loaves, which will help them rise in the oven. Rather than describe in detail, I’ll reference a video here. Pre-shape as shown in this video, using the bench knife to “pull” the loaves across the bench, which stretches their tops as their bases grip the work surface
Cover the loaves with a towel, and let them rest for 30 minutes so that the gluten network in the dough can relax into its new configuration. After 30 minutes it’s time to move on to the secondary fermentation stage.
Secondary Fermentation
In this phase you’ll do the final shaping of the loaf, building more tension in the outer surface, and then transfer it to a banneton to proof.
Banneton Prep
The first time you use a new banneton (or after cleaning one) it needs seasoning with flour. To do this, I spritz the inside of the banneton with water until it’s damp, then add a couple of tablespoons of rice flour and roll it around the banneton until it has an even covering. Leave it for at least an hour before putting dough in there so it can dry out completely. For future bakes, simply sift a bit of rice flour over the banneton.
The reason you want to use rice flour instead of regular flour made from wheat, is because wheat contains proteins that form into gluten when it gets wet. When your loaf goes into the basket, the moisture from the dough can start creating gluten with the flour and cause it to stick. Rice flour does not have this issue.
Shape
Take the preshaped dough, use one firm movement with a bench knife to flip it over (so it’s now upside down). Rather than describing in detail how I shape loaves, I’ll link a video that shows it well.
Essentially though, you are building a bunch of tension in the top surface of the dough. Gently transfer the shaped loaf (still upside down) into the banneton. Remember, what will end up being the upper crust of the loaf sits face down in the banneton.
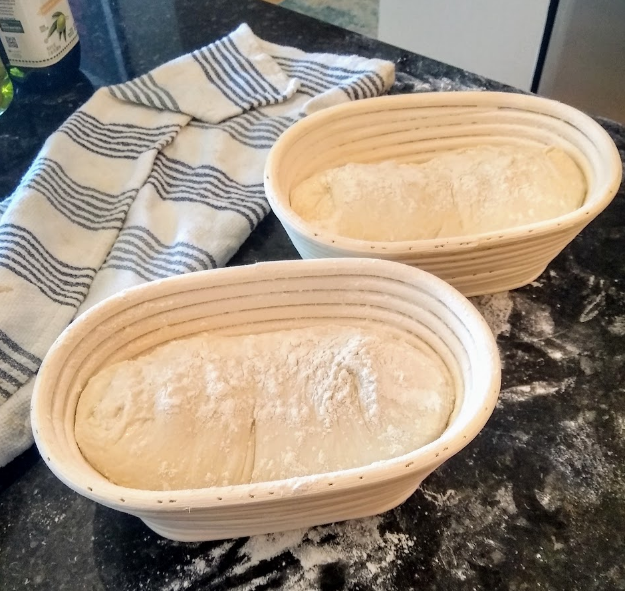
Second Proof
It’s now time for the final proof of the shaped dough. This simply entails loosely covering the bannetons so the dough doesn’t dry out too much, and leaving them to ferment for a period of time. I typically go one of two ways, depending on my personal schedule
- Put the bannetons in a fridge to drastically slow fermentation and leave them for approximately 15 hours.
- Leave the bannetons at room temperature and ferment for 3-4 hours.
Start the oven pre-heating approximately 30 minutes before you think the dough will be proofed. Put the dutch oven and its lid into the oven.
As with the first proof, there is an art to knowing when to stop the second proof. You should typically see that the dough has increased in volume by 20-30%, has a little jiggle to it if you shake the banneton, and you can do the poke test: Wet a finger and briefly poke the dough to a depth of approximately half an inch. If the dough pops back and fills in immediately, it is under-proofed. Give it more time. It should slowly refill, and leave a little indentation where your finger was.
Once the dough is proofed, it is time to bake.
Bake the Dough
Slashing the Dough
Just before putting the dough in the oven (next section), you will cut it with a razor. This section contains details on how I do that.
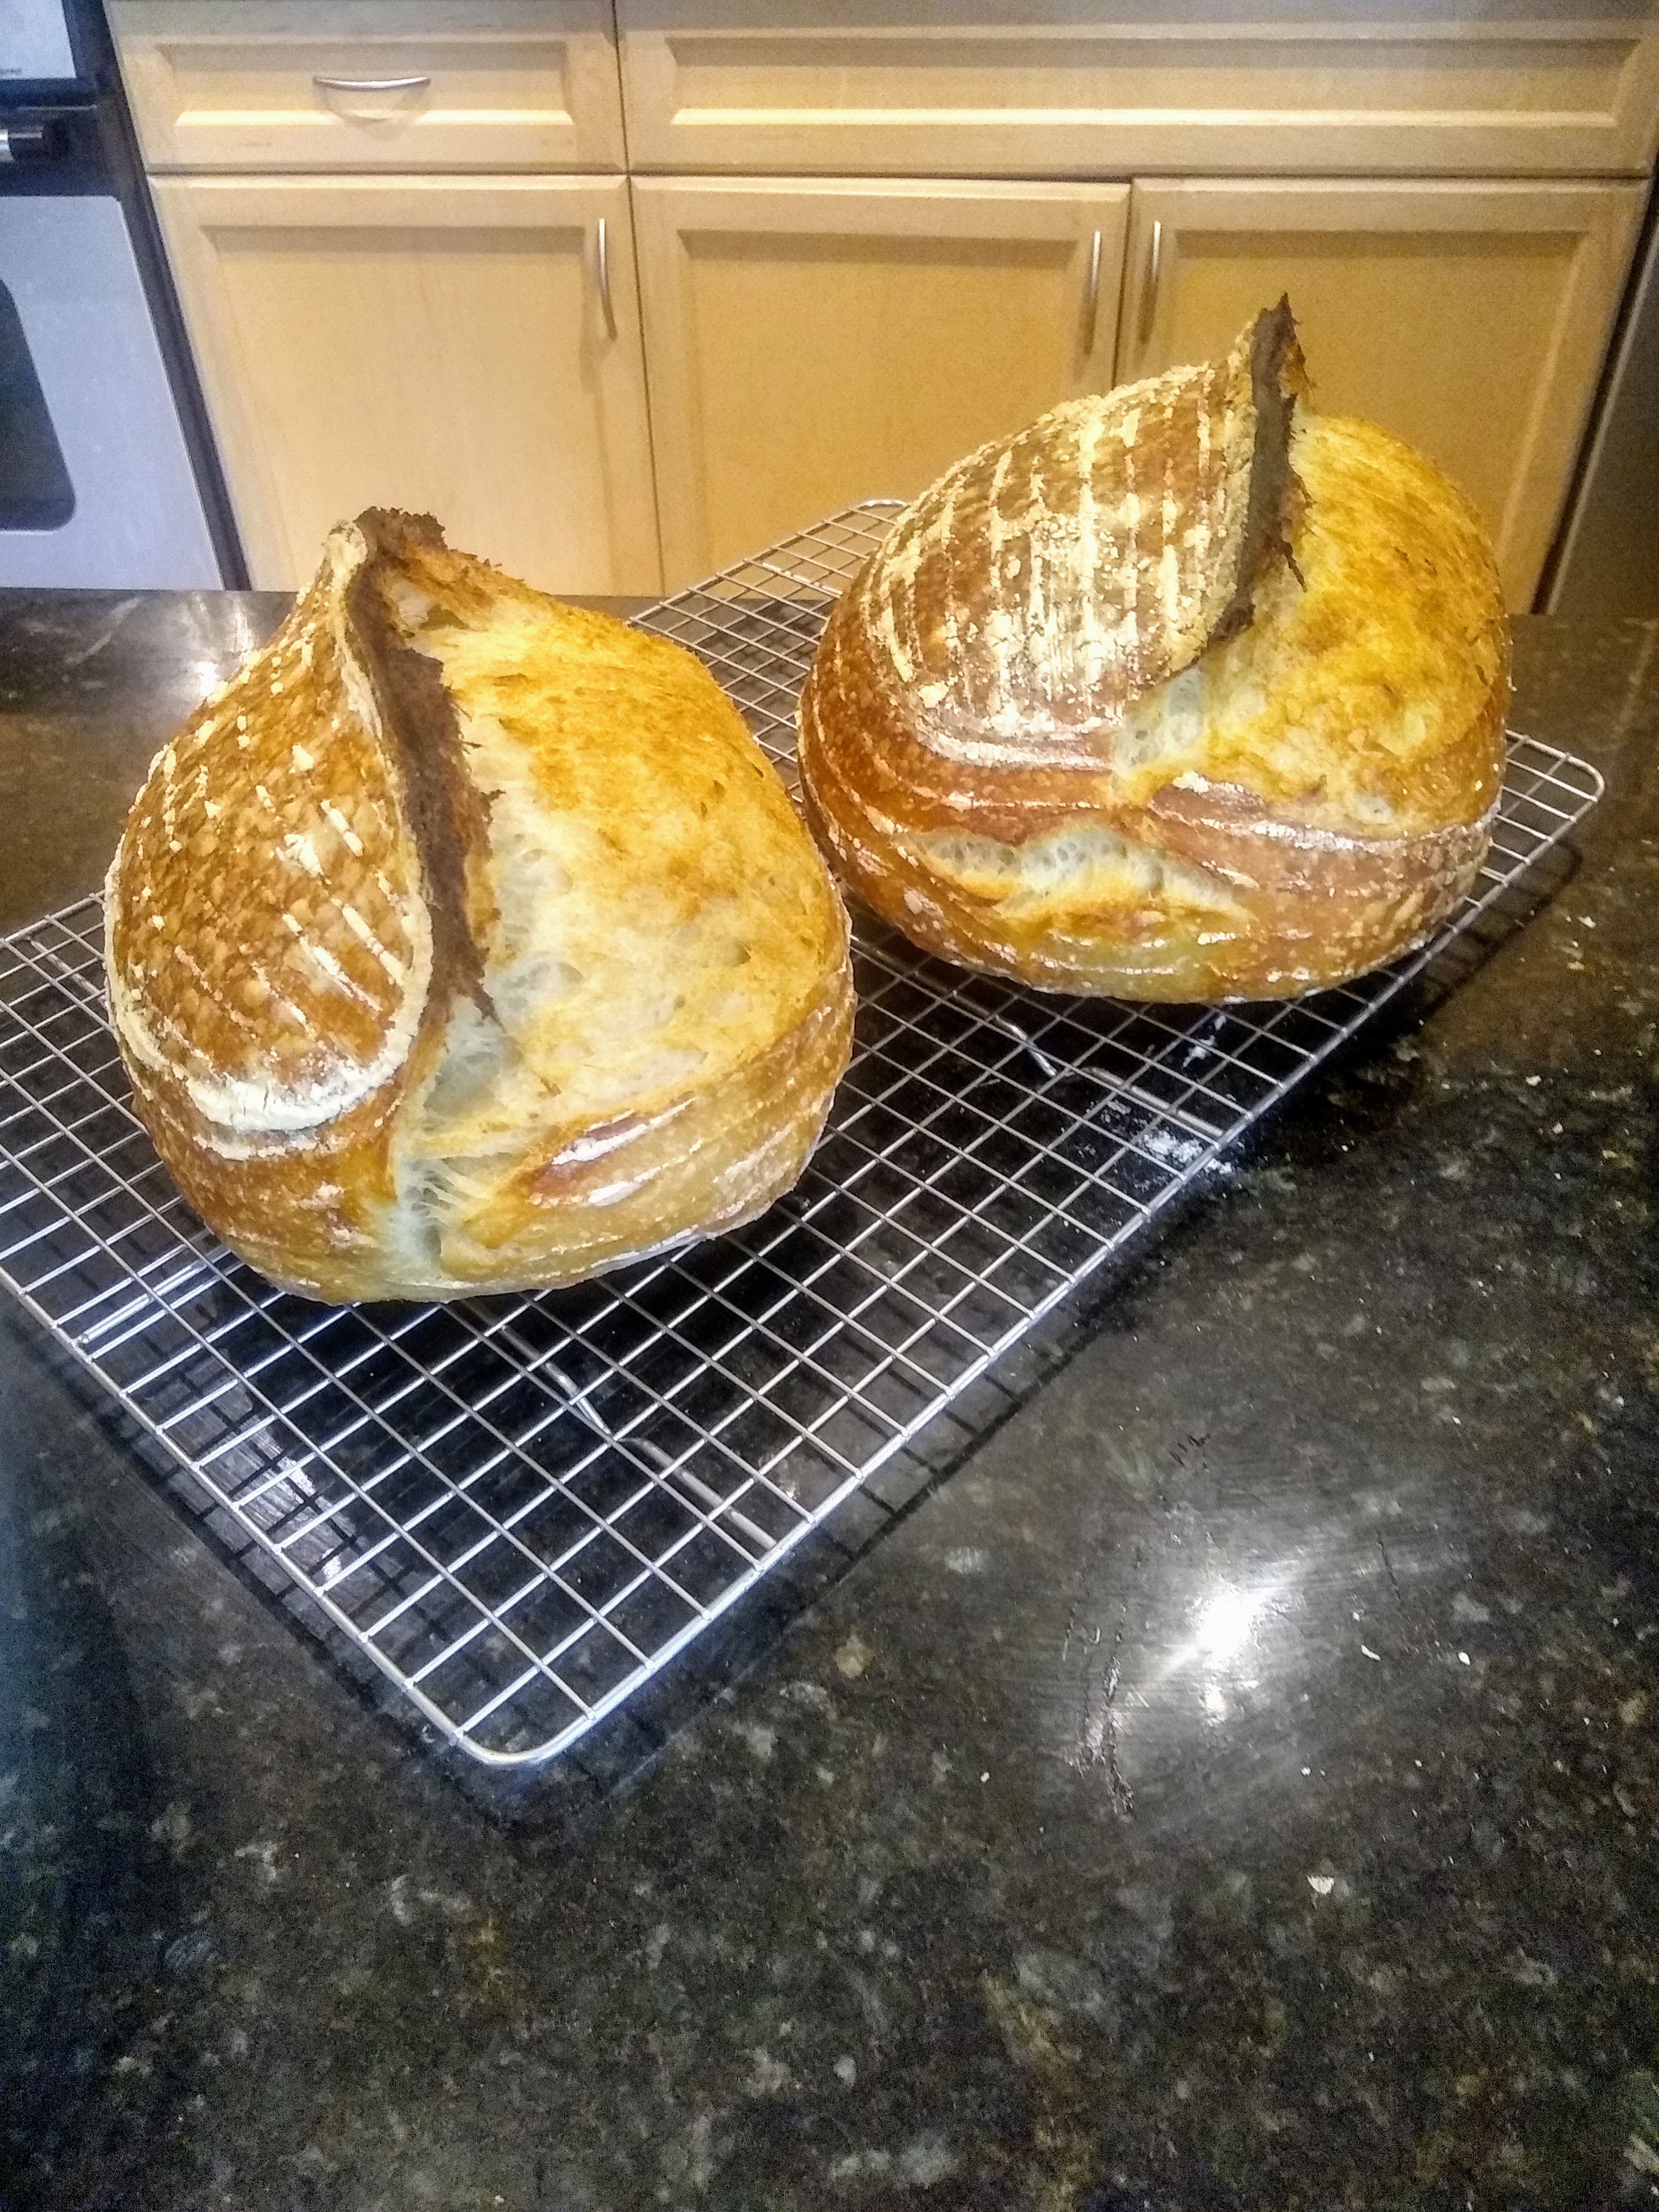
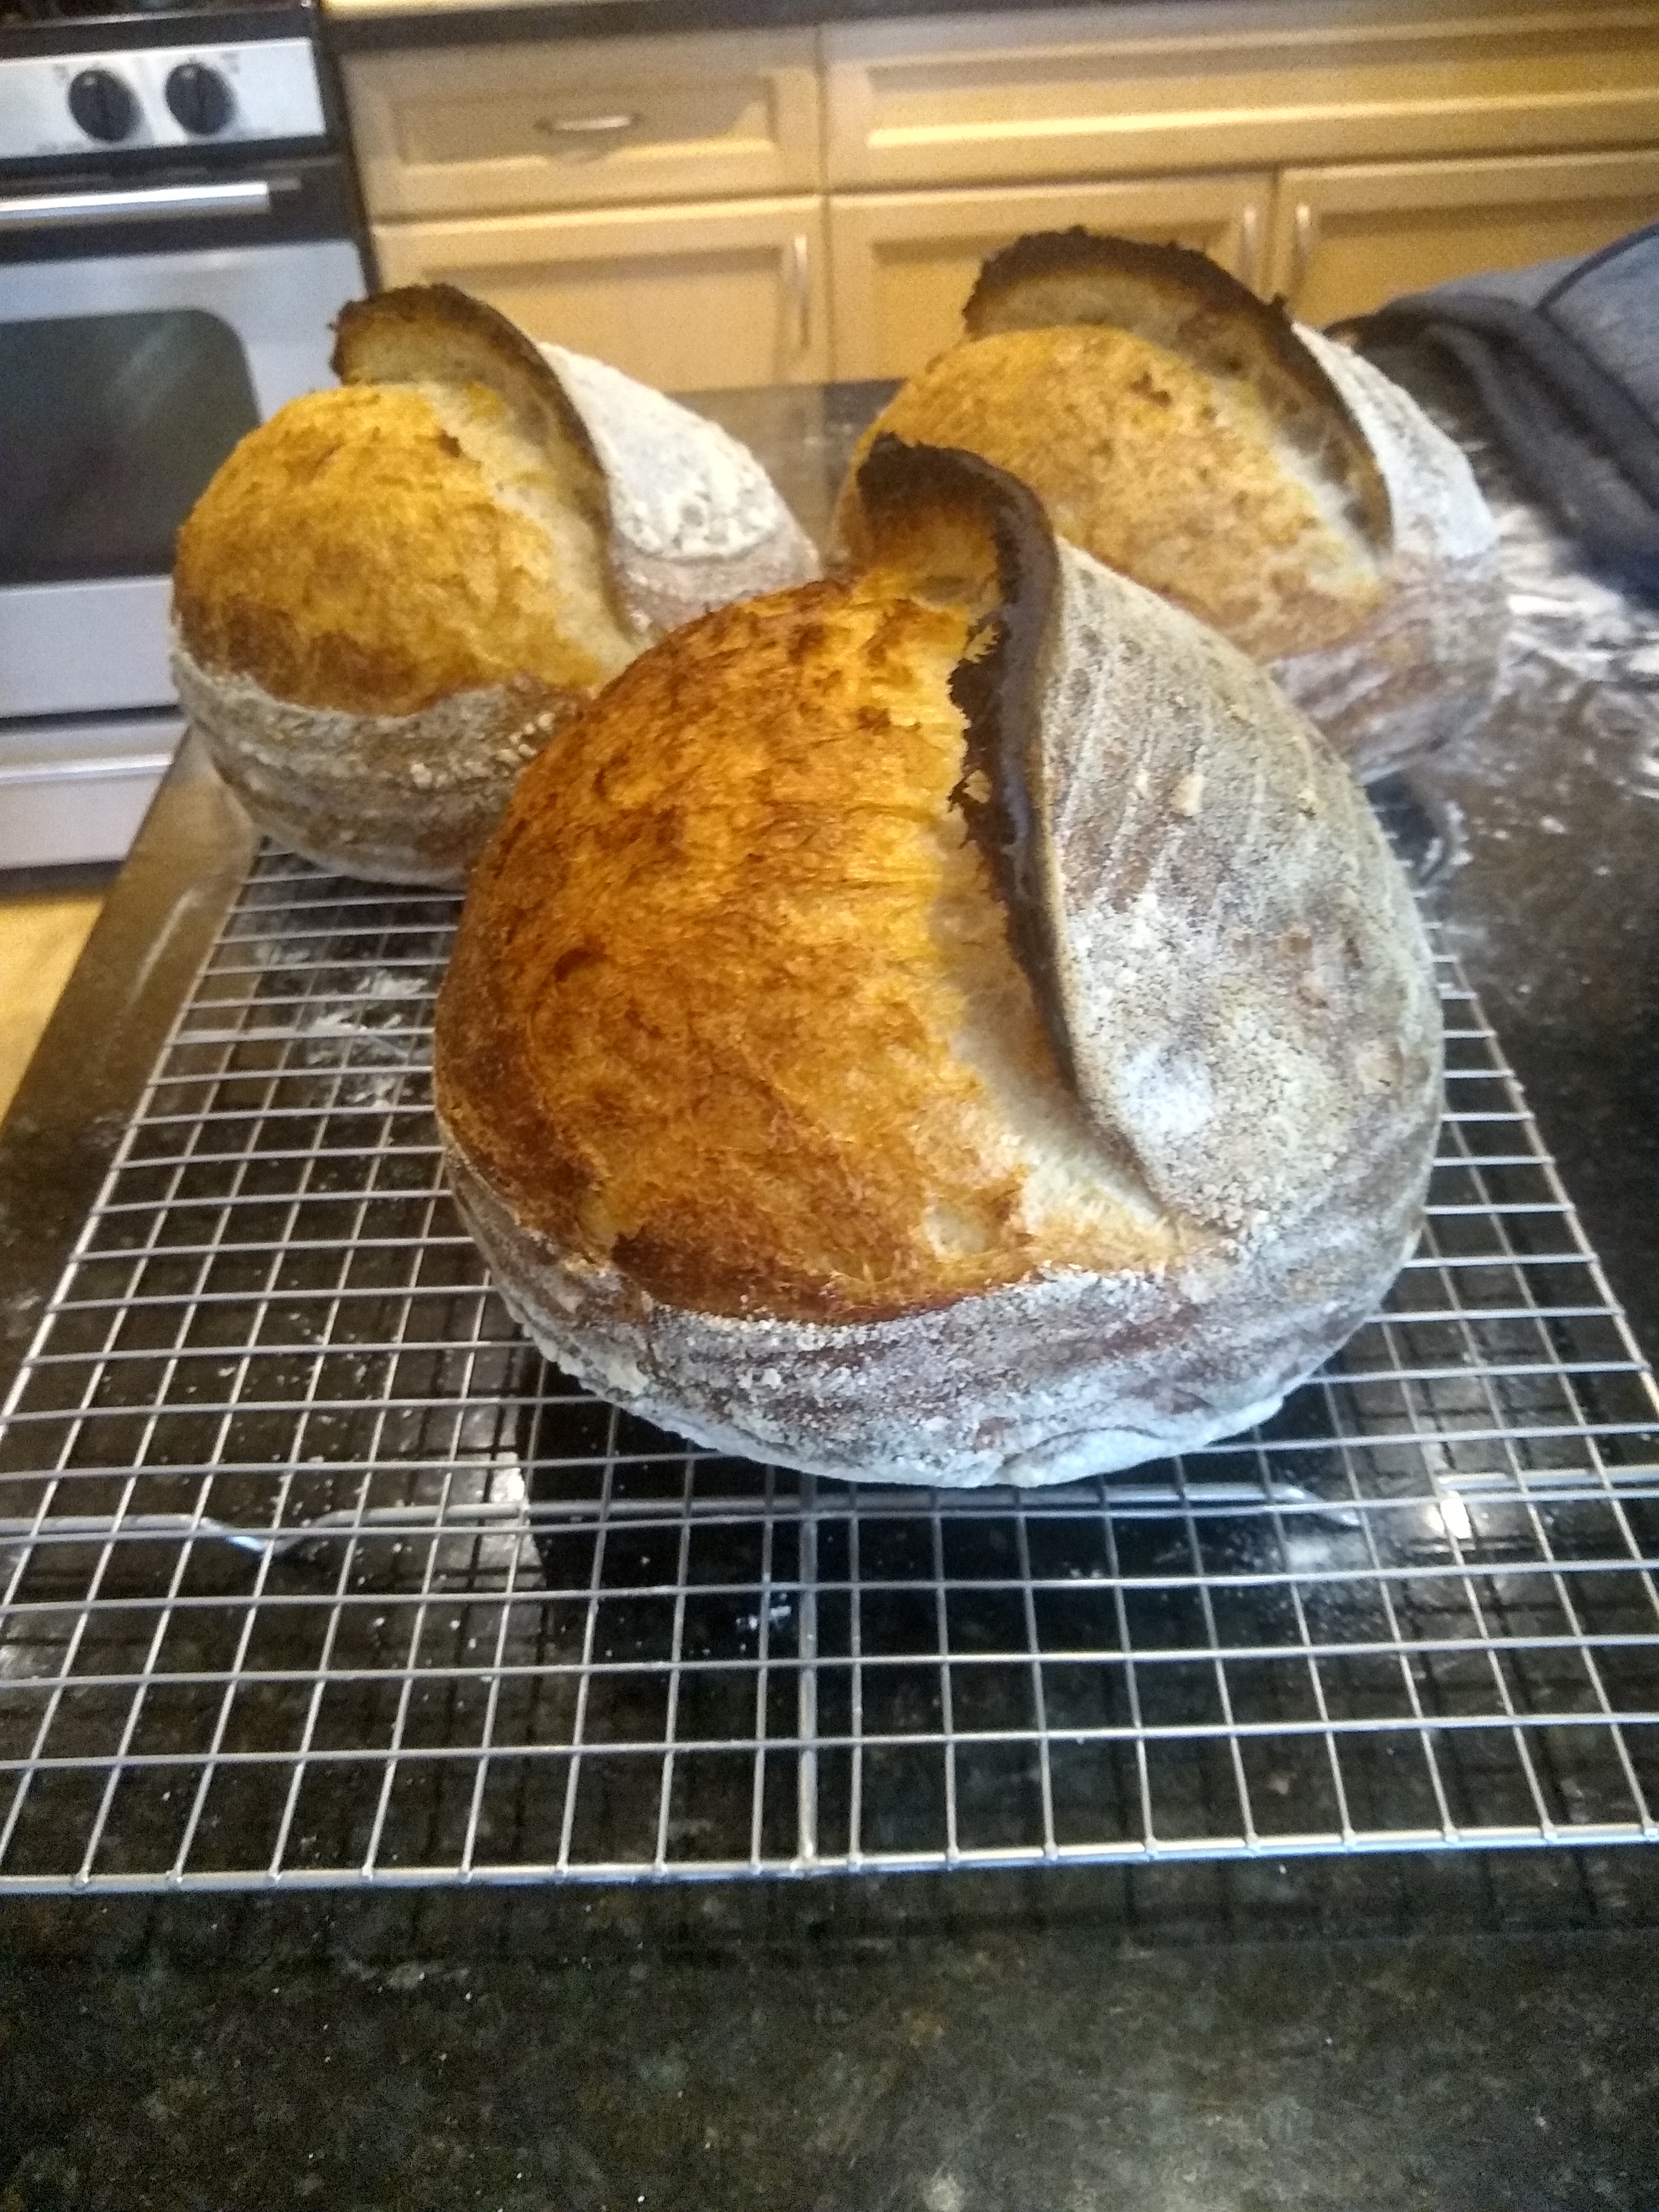
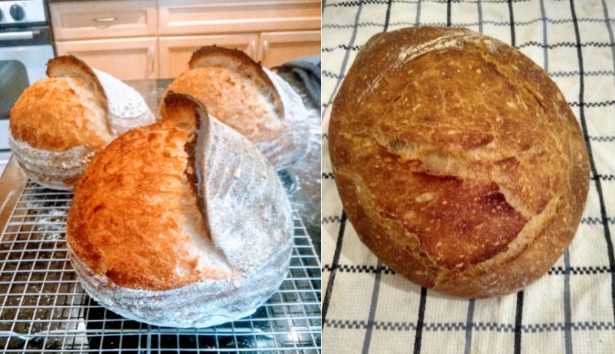
The purpose of this cut is to make a weak spot in the skin of the dough so that it can open up cleanly without tearing. If you choose not to slash the dough you’ll end up with a more rustic look as it tears open as it expands, and it’ll expand somewhat less as the yeast has to do the work of tearing open the skin of the bread. Here are a couple of examples of my loaves with- and without a slash.
It took me a long time to get slashing correct. Here is what worked for me:
- Use a razor blade
- The depth of the cut should be ¼ to ½ of an inch
- Give the blade a quick spritz with spray oil before slashing the dough “Slash”, don’t “hack” at the dough. This should be a single cut, not a sawing motion. If the blade is sticking and you are working it through the dough, that’s a cue to change something up. With me it was generally that I was cutting too deep.
- The angle of the blade is important in two directions:
- Slash at an angle. You’re trying to make a “flap” so that it can raise up into a lovely ear on the loaf. Keep the razor shallow against the bread
- Allow the razor to “drag behind” your hand. Don’t thrust it in there at right angles and drag it around, let it lag a bit behind your hand and let the blade do the work of slicing the dough.
I tend to do a single cut around the edge of the loaf, but many people do very fancy designs.
Baking Process
The hard thing about home baking is that home ovens typically don’t reach the temperatures needed to bake really good bread, and they’re typically configured to vent away steam. Steam is important in the initial phases of bread baking because it keeps the outer crust of the bread cool and prevents it from solidifying too fast, which prevents further expansion.
Using a Dutch Oven gets around both of these problems. To bake the bread we’re going to put an empty Dutch oven, with the lid off, into an oven at 500 degrees. We’ll heat this for at least half an hour until it’s good and hot.
When we place the bread into the hot Dutch oven, we’ll get two effects:
- The dutch oven will trap the steam, keeping the crust of the bread cooler for longer so the bread can expand more
- The inner surface of the Dutch oven will be hot, and it’ll radiatively heat the bread fast, which is what we want.
After the Dutch oven has preheated, take it out of the oven. Immediately upend a banneton of bread onto some baking parchment, slash the loaf and lower it CAREFULLY into the Dutch oven. Cover it with the lid and place it into the oven for 20 minutes.
After 20 minutes, remove the lid. You should see some steam escape. Cook for another 20-30 minutes, until the top of the bread is golden brown to walnut in color.
I have found it helpful to put a pizza stone in the oven, underneath the Dutch oven, at the 20 minute mark. This prevents the bottom of the Dutch oven getting too hot and scorching the bread.
Cooling and Storage
When the bread is golden brown, remove it to a cooling rack, and let it cool to near room temperature BEFORE cutting it.
Never keep the bread in the fridge. Cooler temperatures cause the starches in the bread to recrystallize, and become stale much more quickly. If you want to store bread for a longer period of time, wait for it to cool COMPLETELY then place it into an airtight ziploc bag, and freeze it.
A loaf of bread can be “de-staled” one time in a low temperature oven. I do this as follows:
- Preheat the oven to 300 F
- Run the loaf under the faucet for a fraction of a second, just enough to get the crust wet. If it is a partial loaf, turn it cut-side down so that the crumb is not saturated, but don’t worry if a bit of water gets in there.
- Put the bread in the oven for 8-12 minutes.
Bread Debugging
- Signs of overproofing. Decrease proof time.
- You see good rise in your dough through the process but no rise in the oven.
- Big bubbles collapsed, leaving only smaller ones.
- Signs of underproofing. Increase proof time.
- Your bread has a bew big bubbles, but outside of them is very dense, it is underproofed.